How to Clear Cache in WordPress

How to Clear Cache in WordPress

When your WordPress site starts feeling lazy, one of the quickest and easiest fixes is to clear the cache in WordPress. Caching helps improve website performance, but over time, outdated or conflicting cache files can cause issues. This guide will show you how to clear cache in WordPress, whether you’re using caching plugins or server-side caching tools.

How to Clear Cache in WordPress Follow the Steps

WordPress is a robust content management system (CMS), but like any other system, it can experience slowdowns over time. One of the most effective ways to speed up your site is by clearing its cache. But what is cache, and why does it need clearing?

What is Caching?

How to clear cache in WordPress is crucial because caching is a process where static versions of your website’s content are stored to improve load times. Instead of generating new content every time someone visits your site, cached files allow for quicker access and better performance.

Why Clearing Cache is Essential in WordPress

Over time, your cached files can become outdated or corrupted. This leads to issues such as users not seeing updated content or encountering display errors. Clearing the cache ensures that your visitors always get the freshest, most accurate version of your site.

Types of Cache in WordPress

Types of Cache in WordPress

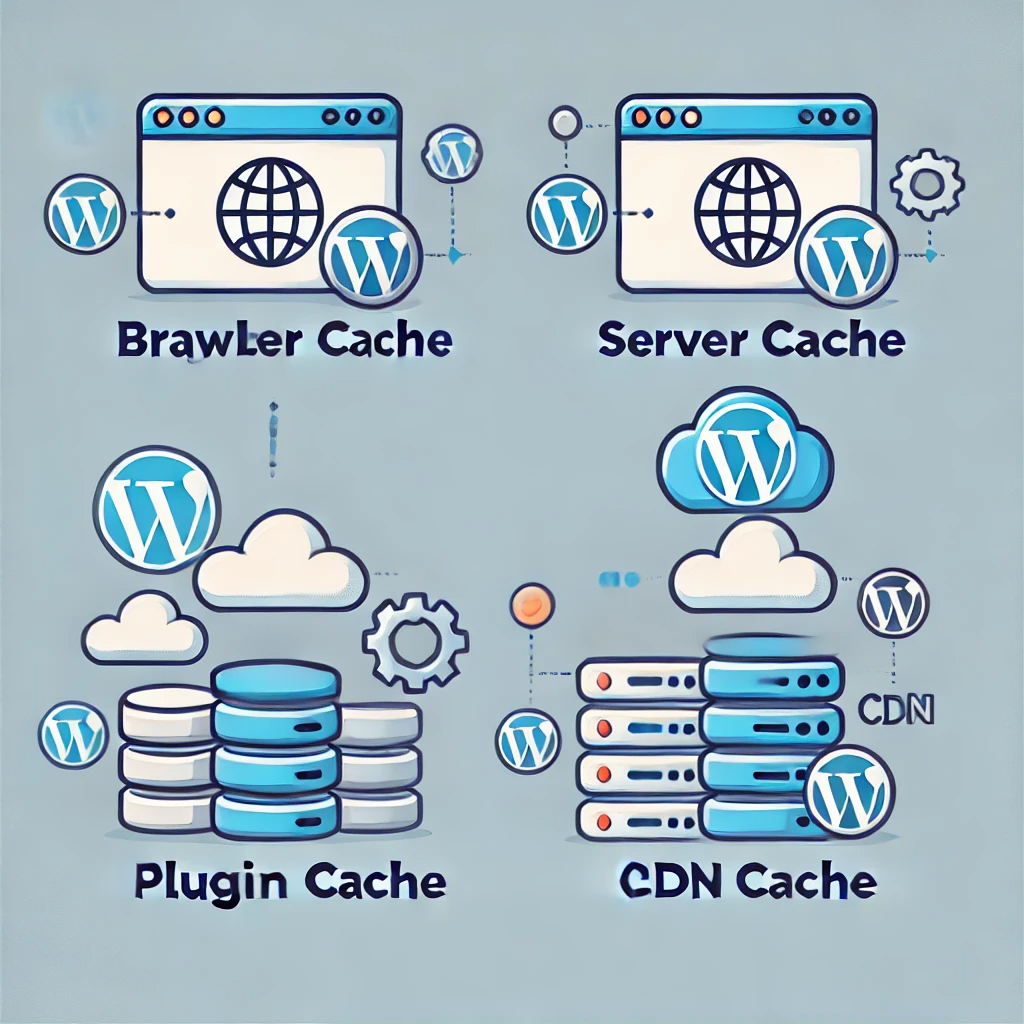
How to clear cache in WordPress isn’t just a one-size-fits-all process. You should take into account several cache layers while optimizing your WordPress website.

1. Browser Cache

This cache is stored on the user’s device. When someone visits your website, their browser saves elements like images, CSS, and JavaScript files to load the page faster next time.

2. Server Cache

Your hosting server might have caching mechanisms that store versions of your site’s content. This helps reduce the load on the server and speeds up delivery.

3. Plugin Cache

There are several caching plugins designed for WordPress, such as WP Super Cache and W3 Total Cache, that create static files of your website content and serve them to users.

4. CDN Cache

If you use a Content Delivery Network (CDN), like Cloudflare, it stores cached copies of your website on servers around the world to help load the site faster for international visitors.

How Caching Works in WordPress

When someone visits your WordPress site, the server pulls data from your database, generates HTML pages, and delivers them to the user’s browser. This can take time, especially if your site has lots of content. Understanding how to clear cache in WordPress is important because caching creates a static version of these pages, so future visitors get the content faster without requiring the server to recreate everything each time.

When to Clear Cache in WordPress

Caching is great, but sometimes you’ll need to clear it. Here are some signs your cache may need clearing:

  • You’ve updated a page or post, but the changes aren’t visible on the site.
  • Some users are seeing old content or broken layouts.
  • You’re encountering error messages related to the cache.

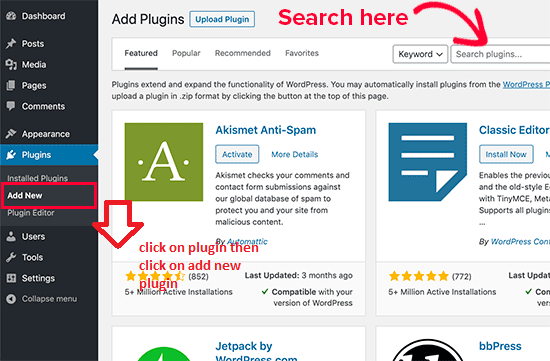
Clearing Cache with WordPress Plugins

There are many caching plugins available for WordPress. Here’s how to clear the cache with some of the most popular ones:

1. WP Super Cache

To clear the cache using WP Super Cache:

  1. Go to your WordPress dashboard.
  2. Navigate to Settings > WP Super Cache.
  3. Click on the Delete Cache button.

2. W3 Total Cache

For W3 Total Cache users:

  1. Go to your WordPress dashboard.
  2. Head to Performance > Dashboard.
  3. Click on the empty all caches button.

3. WP Fastest Cache

To clear cache with WP Fastest Cache:

  1. Select WP Fastest Cache from the WordPress dashboard.
  2. Click on the Delete Cache tab.
  3. Hit the Delete Cache and Minified CSS/JS button.

How to Clear Cache from the Browser

Sometimes, the problem isn’t with WordPress but with your browser.

Here’s how to empty the cache in your browser:

Google Chrome:

  1. Click the three dots in the upper-right corner of Chrome once it has opened.
  2. Select More Tools > Clear Browsing Data.
  3. Choose the Cached images and files option and click Clear Data.

Mozilla Firefox:

  1. In the upper-right corner, click the hamburger menu.
  2. Go to Settings > Privacy & Security.
  3. Click Clear Data under Cookies and Site Data.

Clearing Server-Side Cache

Clearing Server-Side Cache

Some web hosting platforms provide server-side caching tools. Here’s how to manage cache on popular hosts:

SiteGround:

  1. Log in to your SiteGround dashboard.
  2. Go to Speed > Caching.
  3. Clear the Dynamic Cache and Memcached.

Bluehost:

  1. Access your Bluehost portal.
  2. Navigate to the Performance tab and clear the server cache.
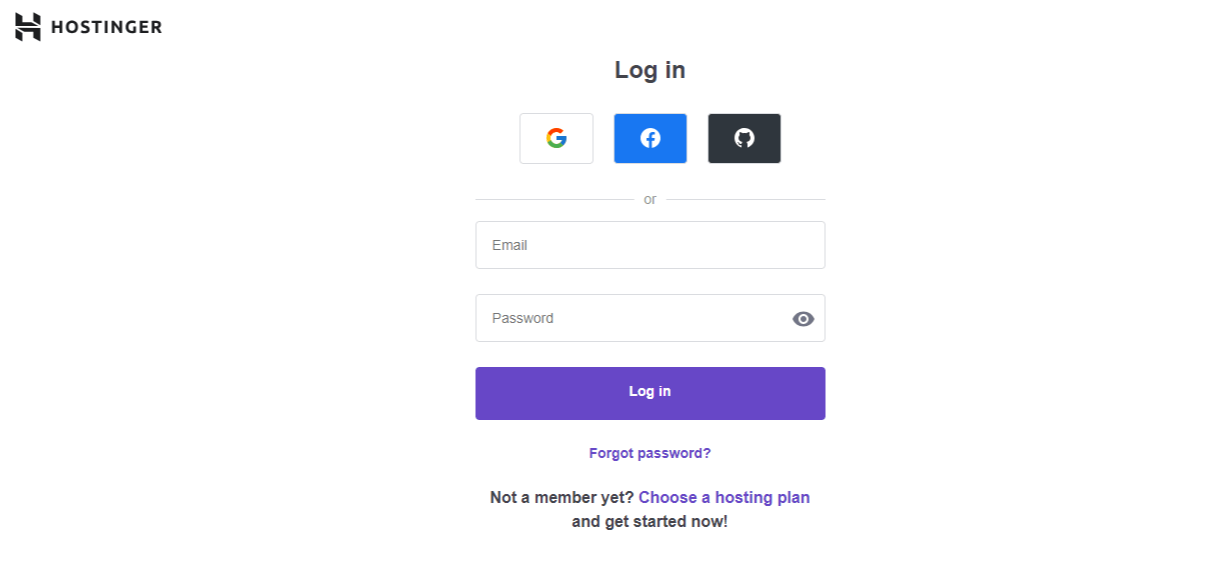
Hostinger:

  1. Go to your Hostinger dashboard.
  2. Under Advanced > Cache Manager, clear the cache.

How to Clear CDN Cache

If you’re using a CDN, you’ll need to clear the cache on their servers.

Cloudflare:

  1. Log in to Cloudflare.
  2. Go to Caching > Configuration.
  3. Click Purge Everything.

How Often Should You Clear Cache?

While clearing cache helps with performance, doing it too often can slow your site down. Clear the cache only when necessary, such as after updating content or troubleshooting an issue.

Troubleshooting Cache-Related Issues

Caching can sometimes cause problems. If you’re experiencing issues, consider:

  • Clearing the cache at all layers: browser, plugin, server, and CDN.
  • Check to see whether the problem is fixed by temporarily disabling the cache.

Using Development Tools to Bypass Cache

If you’re actively developing a WordPress site, it can be not very pleasant to clear the cache constantly. Consider using development tools like browser extensions to bypass cached content.

Benefits of Regular Cache Clearing

Clearing your cache regularly ensures users see the most up-to-date content and experience the fastest load times. It also helps prevent bugs or conflicts caused by outdated cached files.

Automating Cache Clearing in WordPress

To make life easier, you can automate cache clearing:

  1. Use a plugin that supports scheduled cache clearing.
  2. Set up automatic cache purging on your hosting platform or CDN.

Things to Consider Before Clearing Cache

Before clearing your cache, remember that it can temporarily slow your site down as the cache rebuilds. Always clear the cache during low-traffic hours if possible.

Conclusion

Clearing the cache in WordPress is an essential maintenance task that keeps your website running smoothly and ensures your visitors always see the latest version of your content. Whether you’re using plugins, server-side tools, or CDNs, understanding how to clear cache in WordPress is a simple yet effective way to optimize performance.

FAQs

  1. What happens if I don’t clear my cache?
    If you don’t clear your cache, visitors may see outdated content or experience slow load times due to corrupted or stale cache files.
  2. Will clearing the cache delete my content?
    No, clearing the cache only removes the saved versions of your content, not the actual content itself.
  3. How often should I clear the cache in WordPress?
    Clear cache whenever you make significant updates to your website, or if you notice performance issues.
  4. Can I automate cache clearing?
    Yes, many caching plugins and hosting platforms offer automatic cache-clearing options.
  5. Does clearing the cache affect SEO?
    Clearing cache helps ensure that your users and search engines see the most updated version of your site, which can positively impact SEO.
  6. How to clear cache in WordPress without a plugin?
    You can clear cache in WordPress without a plugin by accessing your hosting provider’s cache management tools, such as those available on platforms like SiteGround or Bluehost. Additionally, you can clear the browser cache or any CDN cache you may be using, like Cloudflare, to ensure all layers of caching are addressed.
wordpress login issues

How to Fix Common WordPress Login Issues

WordPress login issues can be incredibly frustrating, especially when locked out of your website. Whether you’re dealing with an incorrect password, a broken plugin, or server errors, these problems can leave your site inaccessible. But don’t worry—most WordPress login issues are solvable with some troubleshooting and the right approach.

\In this article, we’ll break down the most common WordPress login problems and how to fix them, so you can get back to managing your site without any further hassle.

Understanding WordPress Login Issues

WordPress is a powerful platform, but like any software, it can occasionally run into problems—especially with logging in. Some common scenarios include:

  • You input the right username and password, but nothing happens.
  • You’ve forgotten your login credentials entirely.
  • A plugin or theme is causing a conflict, locking you out.
  • Server issues, white screens, or database errors.

The causes of login issues vary from something as simple as a browser cache problem to more complex technical issues like PHP memory exhaustion. Whatever the issue, it’s essential to resolve it quickly, as prolonged downtime can harm your business, SEO rankings, and overall user experience.

Incorrect Password or Username

One of the most common reasons for WordPress login failure is simply entering the wrong username or password. It happens to the best of us, but the good news is that WordPress has built-in methods to recover from this situation.

How to Reset Your WordPress Password

If you’ve forgotten your password, follow these steps:

  1. Go to the WordPress login page (yoursite.com/wp-admin).
  2. Click on the “Lost your password?” link.
  3. Enter the email address linked with the account.
  4. You will receive an email containing a link to reset your password.

Be sure to choose a strong password for better security. A mix of uppercase and lowercase letters, numerals, and special characters is good.

Recovering Your Username

If you’ve forgotten your username, you can use your email address to log in instead. In the worst-case scenario, you can also access your database via phpMyAdmin to look up your username in the wp_users table.

Lost Access to the Admin Email

Losing access to the admin email can be problematic since you’ll need it to reset your password. However, there are alternative ways to regain control.

Regaining Access via phpMyAdmin

If you have access to your hosting account or cPanel, you can use phpMyAdmin to reset your email address right in the WordPress database:

  1. Log into your hosting account and launch phpMyAdmin.
  2. Find your WordPress database and click on the wp_users table.
  3. Change the email address connected with the admin user and save your changes.
  4. You can now request a password reset using the new email.

This method bypasses the need for email access and gives you direct control over your admin credentials.

Browser Cache and Cookies Issues

Your browser stores cached versions of websites and cookies, which can sometimes cause issues with logging in, especially after updates or changes to your WordPress site.

Clearing Cache and Cookies

If you suspect this is the problem, clearing your browser’s cache and cookies often resolves the issue. In most browsers, you can do this by going to the settings menu, selecting “Clear browsing data,” and choosing to remove cookies and cached files. After clearing, restart your browser and try to log in again.

Plugin Conflicts

Plugins are an essential part of WordPress, but occasionally, a misbehaving plugin can cause login problems.

How to Disable Plugins via FTP

If you suspect a plugin is causing the issue, you can disable all plugins temporarily by accessing your WordPress files via FTP:

  1. Log in to your website via FTP or through your hosting control panel.
  2. Navigate to wp-content/plugins.
  3. Rename the plugins folder to plugins_backup disable all plugins.
  4. Try logging in again.

If this resolves the issue, you can rename the folder back and then deactivate each plugin one by one from the WordPress dashboard to identify the culprit.

Theme Compatibility Issues

Themes, like plugins, can sometimes cause conflicts. If your theme is out of date or not compatible with the latest version of WordPress, it can prevent you from logging in.

Switching to the Default WordPress Theme

To determine if your theme is causing the problem:

  1. Access your website files via FTP.
  2. Go to wp-content/themes and rename your active theme’s folder.
  3. WordPress will automatically revert to a default theme like Twenty Twenty-One.
  4. Try logging in again.

If this works, you may need to update or replace your theme.

WordPress Site URL Problems

Incorrect WordPress URL settings can also lead to login issues, particularly after migrating a site or changing domains.

Updating WordPress URL in wp-config.php

To correct this:

  1. Access your wp-config.php file via FTP.
  2. Add the following lines:
    rust
    define('WP_HOME','http://yourwebsite.com');
    define('WP_SITEURL','http://yourwebsite.com');
  3. Save the file and try to log in again.

This ensures that your WordPress installation points to the appropriate URLs.

Server or Hosting Issues

Sometimes, the issue lies not with WordPress but with your hosting provider. If your server is down or experiencing issues, it can prevent you from accessing your site.

Contacting Your Hosting Provider

Check your hosting provider’s status page or contact their support team. . They can help you identify any server-related issues or resource limitations.

Corrupted .htaccess File

A corrupted .htaccess file can cause various WordPress issues, including login problems.

How to Regenerate .htaccess

To fix this:

  1. Access your WordPress root directory via FTP.
  2. Rename your .htaccess file to .htaccess_old.
  3. Log into your WordPress dashboard and navigate to Settings > Permalinks.
  4. Click “Save Changes” to recreate the.htaccess file.

PHP Memory Limit Exhaustion

WordPress requires a specific amount of RAM to run properly. If your PHP memory limit is too low, it can cause login issues.

Increasing PHP Memory Limit

To increase your PHP memory limit:

  1. Open your wp-config.php file.
  2. Add this line:
    sql
    define('WP_MEMORY_LIMIT', '256M');
  3. Save the file and try logging in again.

White Screen of Death (WSOD)

The “White Screen of Death” is one of the most frightening problems that WordPress users can face. Essentially, it’s a blank white screen that offers no clues about what went wrong.

Steps to Resolve WSOD

  1. Increase the PHP memory limit, as indicated above.
  2. Disable all plugins by renaming the plugin folder.
  3. Switch to a default theme via FTP.

If the issue persists, there could be a deeper conflict in your WordPress files or server configuration.

Database Connection Errors

A database connection error can prevent you from logging in entirely.

How to Fix Database Connection Errors

  1. Verify your database credentials in the wp-config.php file.
  2. Repair your database by adding this line to wp-config.php:
    sql
    define('WP_ALLOW_REPAIR', true);
  3. Visit yoursite.com/wp-admin/maint/repair.php and follow the instructions.

Two-Factor Authentication Problems

While two-factor authentication (2FA) adds a layer of security, it can also lock you out if there’s a misconfiguration or if you’ve lost access to your authentication method.

How to Disable or Reset 2FA

  1. Disable 2FA via your hosting account or by renaming the plugin responsible for 2FA via FTP.
  2. Reset your 2FA settings once logged in.

Conclusion

WordPress login issues can be daunting, but most can be resolved with some straightforward troubleshooting. Whether it’s a forgotten password, a plugin conflict, or a server issue, there’s usually a fix. Regularly backing up your site and keeping plugins, themes, and WordPress itself updated can prevent many of these problems from occurring in the first place.

FAQs

  1. What should I do if I forget my username and email address?
    • Access your database via phpMyAdmin to retrieve your username and reset your email.
  2. Can a corrupted database cause login issues?
    • Yes, database corruption can prevent logins. Use the database repair tool to fix it.
  3. How can I check if a plugin is causing my login issue?
    • Disable all plugins via FTP and attempt to log in. If successful, re-enable plugins one by one to find the culprit.
  4. Why does the “White Screen of Death” occur on WordPress?
    • The WSOD often occurs due to PHP memory limits, plugin conflicts, or theme issues.
  5. Can changing my hosting provider fix login problems?
    • If your login issues are server-related, switching to a more reliable hosting provider can
how to add a drop down menu in wordpress

How to add a Drop Down Menu in WordPress

Adding a drop-down menu is one of the easiest ways to improve navigation on your WordPress website. In this guide, we’ll walk you through how to add a drop down menu in WordPress using different methods depending on your setup. Whether you’re using the Site Editor, WP Admin, or Customizer, this tutorial will help you create an effective and user-friendly menu.

Why Use a Drop-Down Menu in WordPress?

Drop-down menus enhance your site’s organization and make it easier for users to navigate. They allow you to group related pages under a parent item, which keeps your menu clean and structured.

Step-by-Step Guide: How to Add a Drop-Down Menu in WordPress

1. Determine Which Method to Use

Before diving into how to add a drop-down menu in WordPress, determine which method applies to your site. Navigate to Appearance in your WordPress dashboard. If you see an option for Editor, follow the Site Editor instructions. Otherwise, use the WP Admin or Customizer method.

2. How to Add a Drop-Down Menu in WordPress Using the Site Editor

In WordPress’s Site Editor, menus are managed through the Navigation block.

You may add a drop-down menu in this way:

  1. Go to Appearance → Editor from your WordPress dashboard.
  2. Choose the template or template part to edit, or click the site preview to access the homepage editor.
  3. Open the List View by clicking the icon with three horizontal lines at the top-left of your screen.
  4. Select the Navigation block (this may be inside other blocks like Header, Group, or Row).
  5. In the right-hand sidebar, hover over a menu item and click the three dots that appear.
    • If the sidebar isn’t visible, click the Settings icon (a square with two uneven columns) in the top-right corner.
  6. Click the Add submenu, then select the first page you want to appear in the drop-down.
  7. Repeat this process to add all necessary menu items.
  8. Click Save to apply your changes.

3. How to Add a Drop-Down Menu in WordPress Using WP Admin

If you’re using the WP Admin dashboard, here’s how to add a drop-down menu in WordPress:

  1. Go to Appearance → Menus in your WordPress dashboard.
  2. Create a new menu or select an existing one.
  3. To add a drop-down, drag and drop menu items slightly to the right under a parent item.
  4. Click Save Menu to save your changes.

4. Adding an Unclickable Menu Item in WordPress

Sometimes, you want to create a parent menu item that doesn’t link to any page. Here’s how to create an unclickable menu item:

  1. Go to Appearance → Editor in your dashboard.
  2. Select the Navigation block.
  3. Use the + block inserter to add a new menu item.
  4. Click Add Block and choose Custom Link.
  5. Enter a # the symbol in the link field and press Enter.
  6. Edit the text of the menu item as needed.
  7. Click Save to apply the change.

5. How to Add a Drop Down Menu in WordPress Customizer

For users working with themes that support the WordPress Customizer, follow these steps:

  1. Navigate to Appearance → Customize.
  2. Go to Menus and either create a new menu or select an existing one.
  3. Drag and drop items to create sub-menus under the parent items.
  4. Click Publish to save your changes.

Final Thoughts on Adding Drop-Down Menus in WordPress

Now that you know how to add a drop-down menu in WordPress, you can improve the navigation and user experience on your website. Drop-down menus make it easier for visitors to find what they are looking for, and they help keep your menu clean and organized. Whether you’re using the Site Editor, WP Admin, or Customizer, follow the steps above to get started.


Conclusion

Adding a drop-down menu to your WordPress site is a straightforward process that enhances navigation and improves the overall user experience. Whether you’re using the Site Editor, WP Admin, or Customizer, following the steps outlined in this guide will help you create clean, user-friendly menus.

Drop-down menus not only make your website more organized but also make it easier for visitors to find relevant content. With WordPress’s flexible tools, customizing your site’s navigation is simple, even for beginners.

FAQs

1. What is a drop-down menu in WordPress?
A drop-down menu is a navigational tool that allows website visitors to access sub-menu items by hovering over or clicking on a main menu item. It helps in grouping related pages under one parent item, making your website’s navigation more organized.

2. How do I add a drop-down menu in WordPress without using a plugin?
You can add a drop-down menu in WordPress by using the built-in Site Editor, WP Admin, or Customizer. The steps differ slightly depending on the method, but you can achieve this by organizing menu items under a parent item.

3. Can I add a drop-down menu to any WordPress theme?
Most modern WordPress themes support drop-down menus. However, the exact process might vary based on the theme’s specific setup. Themes like Astra, OceanWP, and others have user-friendly customization options for adding drop-down menus.

4. How can I make a menu item unclickable in a drop-down menu?
To make a menu item unclickable, simply add a # symbol in the link field when creating or editing the menu item. This ensures that the item can still serve as a header for your drop-down but won’t navigate to any page.

5. Can I change the order of menu items in a drop-down?
Yes, in the WP Admin → Menus section or in the Site Editor, you can drag and drop menu items to rearrange them. You can also nest items under a parent item to create sub-menus.

6. Is it possible to add images or icons to drop-down menu items?
Yes, you can add icons or images to menu items, but this feature may depend on your theme or plugins. Some themes come with built-in options to add icons, or you can use plugins like “Menu Icons” to include them.

7. Will my drop-down menu work on mobile devices?
Yes, most WordPress themes are responsive, meaning your drop-down menu should automatically adapt to mobile devices. However, you may want to test how it looks and functions on different screen sizes to ensure a smooth user experience.

How to Fix a Slow WordPress Site

How to Fix a Slow WordPress Site in Under 10 Minutes

If you’re wondering how to fix a slow WordPress site, you’re not alone. A slow WordPress site can be frustrating for both visitors and site owners. In today’s digital age, site speed is critical for user experience, SEO rankings, and conversion rates. If your WordPress site is sluggish, don’t worry. You can speed it up significantly in under 10 minutes.

This guide will walk you through quick and effective methods to turbocharge your site performance without spending hours troubleshooting.

Why Should You Fix a Slow WordPress Site?

If your website loads slowly, it affects more than just your visitor’s experience. A slow site can lead to reduced search engine rankings, decreased conversions, and higher bounce rates. But you can easily fix a slow WordPress site by addressing a few common issues like unoptimized images, too many plugins, or poor hosting.

Why is Your WordPress Site Slow?

Before diving into solutions, it’s important to understand why your site might be slow. Various factors may be involved, including:

  • Heavy or unoptimized images
  • Too many plugins
  • Inefficient hosting
  • Outdated WordPress or plugins
  • Poorly coded themes

Once you know the potential culprits, you can take action to fix these issues in no time.

1. Optimize Images for Faster Loading Times

One of the biggest contributors to a slow WordPress site is large, unoptimized images. Fortunately, this can be fixed quickly by compressing your images without compromising quality.

Solution:

  • Smush or ShortPixel are two plugins you may use to automatically optimize and compress your photographs.
  • Alternatively, you can use tools like TinyPNG to compress images before uploading them to WordPress.

By optimizing your images, you can reduce the load time significantly.

2. Select a Fast and Reliable Hosting Provider

Your website speed is determined by your hosting provider.  If you’re using a shared hosting plan, your site may be sharing resources with hundreds of others, which can slow it down.

Solution:

  • Switch to a managed WordPress hosting provider like Kinsta or WP Engine.
  • If you’re sticking with shared hosting, consider switching to a faster provider like Hostinger SiteGround or Bluehost.

Better hosting can drastically improve your site’s performance in just a few minutes.

These services are specifically optimized for WordPress and can help you quickly fix a slow WordPress site by providing better performance.

3. Install a Caching Plugin

Caching is one of the easiest and fastest ways to fix a slow WordPress site. It stores a static version of your site, so the server doesn’t have to process the same requests repeatedly.

Solution:

  • Install the W3 Total Cache, WP Rocket, or LiteSpeed Cache caching plugins.
  • Configure the settings to enable caching for pages, posts, and other content types.

This quick fix can instantly make your WordPress site load faster for returning visitors.

4. Deactivate and Delete Unused Plugins

Every plugin you install adds extra code to your site, which can slow it down, especially if you have unnecessary or outdated plugins. Reducing the number of active plugins will significantly improve your site’s speed. A quick way to fix a slow WordPress site is to deactivate and delete any unused or unnecessary plugins.

Solution:

  • Visit Plugins > Installed Plugins on your WordPress dashboard.
  • Deactivate and delete any plugins you no longer need or use.
  • Consider replacing multiple plugins with all-in-one solutions, like Jetpack, to reduce load.

Keeping your plugin list lean and efficient ensures a smoother and quicker website experience.

5. Update WordPress, Themes, and Plugins

Outdated WordPress versions, themes, and plugins can lead to slower load times and even security vulnerabilities. Regular updates ensure that your site is optimized for performance.

Solution:

  • Go to Dashboard > Updates and install any available updates.
  • Update to the most recent versions of your plugins and theme.
  • Enable automatic updates for future versions to avoid unnecessary delays.

Maintaining updates makes your website faster and safer.

6. Use a Lightweight Theme

Heavy, poorly coded themes can cause WordPress to load slowly. If you’re using a complex theme with too many features, switching to a lightweight, well-coded theme can make a world of difference.

Solution:

  • Use a lighter theme, such as Neve, GeneratePress, or Astra.
  • Avoid themes with excessive animations, sliders, or bundled plugins.

A clean, minimal theme reduces the amount of code your site has to load, speeding things up immediately.

7. Minify CSS, HTML, and JavaScript Files

Minifying files means removing extraneous characters from your CSS, HTML, and JavaScript files, such as spaces, line breaks, and comments. This reduces file size and makes your site load faster.

Solution:

  • Installing the Autoptimize plugin will automatically minify your CSS, HTML, and JavaScript files.
  • Configure the plugin to enable file compression and lazy loading of images.

These small changes can lead to noticeable speed improvements in less than 10 minutes.

8. Use a Content Delivery Network (CDN)

A Content Delivery Network (CDN) stores copies of your website’s files on multiple servers worldwide, delivering them from the server closest to the visitor. This drastically reduces loading time, especially for international visitors.

Solution:

  • Sign up for a free CDN service like Cloudflare or use premium options like KeyCDN or StackPath.
  • Set up the CDN using a plugin like WP Rocket or by directly integrating it with your site.

CDNs are particularly helpful for sites with global audiences and can make your site lightning-fast in just minutes. Setting up a CDN can significantly fix a slow WordPress site, especially for global visitors.

9. Clean Up Your Database

Over time, your WordPress database may become clogged with useless data, such as post changes, drafts, spam comments, and other temporary files. This can severely affect your website’s speed.

Solution:

  • Use a plugin like WP-Optimize or Advanced Database Cleaner to clean and optimize your database.
  • Schedule regular database cleanups to keep it lean and efficient.

Your database can lead to a noticeable improvement in speed within just a few clicks. Cleaning it up can help you fix a slow WordPress site quickly.

10. Disable Hotlinking to Preserve Bandwidth

Hotlinking occurs when other websites use your images directly by linking to them on your server. This uses up your bandwidth and slows down your site.

Solution:

  • Include the following code in your.htaccess file:
RewriteEngine on
RewriteCond %{HTTP_REFERER} !^$
RewriteCond %{HTTP_REFERER} !^http(s)?://(www\.)?yourwebsite.com [NC] RewriteRule \.(jpg|jpeg|png|gif)$ – [F,NC,L]

By preventing hotlinking, you free up server resources and improve site speed.

Conclusion How to Fix a Slow WordPress Site

Improving your WordPress site’s speed doesn’t have to be a time-consuming process. Following these 10 quick fixes can significantly boost your site’s performance in under 10 minutes. From optimizing images to installing caching plugins and cleaning up your database, these easy steps will lead to faster load times, a better user experience, and improved SEO rankings.

Remember that a fast-loading site keeps visitors satisfied and helps your website rank higher on search engines. So, take action today and enjoy the benefits of a speedy WordPress site!

Faqs

1. Why is my WordPress site slow?

There are several reasons why your WordPress site might be slow, including:

  • Large, unoptimized images
  • Too many plugins
  • Poor hosting service
  • Outdated WordPress or plugins
  • A bloated database
  • A heavy theme with unnecessary features

2. How can I check my website speed?

You can check your website speed using online tools like:

  • Google PageSpeed Insights
  • GTmetrix
  • Pingdom Tools These tools provide a detailed analysis of your site’s performance and suggestions for improvement.

3. What is a caching plugin, and how does it help?

A caching plugin creates a static version of your site, reducing the number of requests made to your server. This speeds up loading times for returning visitors. LiteSpeed Cache, W3 Total Cache, and WordPress Rocket are a few of the well-known caching plugins.

4. Does the theme I use affect my site’s speed?

Yes, your site’s speed can be greatly affected by the theme you choose. Heavy themes with complex features and poor coding can slow down your site. Using a lightweight theme like Astra, GeneratePress, or Neve can improve performance.

5. How often should I clean my WordPress database?

Maintaining the functionality of your WordPress website is facilitated by routine database cleaning. It’s recommended to clean it at least once a month, especially if you’re frequently publishing content. Plugins like WP-Optimize allow you to automate this procedure.

6. What exactly is image optimization, and what makes it crucial?

Compressing photos to lower their file size without sacrificing quality is known as “mage optimization.” quality. This reduces the amount of data your website needs to load, which results in faster load times and a better user experience. Plugins like Smush and ShortPixel can help optimize images automatically.

7. Will upgrading my hosting service improve my site’s speed?

Yes, upgrading to a better hosting service can dramatically improve your site’s speed. Shared hosting plans can be slow due to the number of websites sharing server resources. Switching to managed WordPress hosting or a more powerful plan like VPS can offer better performance.

8. Can I speed up my WordPress site without using plugins?

Yes, there are manual ways to speed up your site without plugins, such as:

  • Compressing images before uploading
  • Minifying CSS, HTML, and JavaScript files
  • Disabling hotlinking
  • Updating WordPress, themes, and plugins regularly However, plugins can automate many of these tasks, making them easier to manage.

9. What is a Content Delivery Network (CDN), and do I need one?

A CDN stores copies of your website’s files on multiple servers worldwide and delivers them to visitors from the server closest to them. This reduces load times for global visitors. If you have a large international audience, using a CDN like Cloudflare can greatly improve speed.

10. How do I prevent other sites from hotlinking my images?

To prevent hotlinking, you can add code to your .htaccess file that blocks other websites from using your images directly. This conserves your server’s bandwidth and improves your site’s performance. Many security plugins also provide an option to prevent hotlinking.

How to Fix Images Alt Text Issue in WordPress

How to Fix Images Alt Text Issue in WordPress: A Step-by-Step Guide

Images are essential to creating an interesting and visually appealing website. However, many website owners overlook the importance of properly setting the alt text for their images. In WordPress, the alt text not only improves accessibility but also plays a crucial role in SEO. If you’re facing issues with your images’ alt text, this guide on how to fix images alt text issue in WordPress will help you fix them effectively.

Why Alt Text Matters

Before diving into the solutions, let’s understand why alt text is so important. Alt text (alternative text) is used to describe the content of an image. It serves multiple purposes:

  • Accessibility: Screen readers can describe images to people who are blind or visually handicapped by using alt text.
  • SEO: Search engines use alt text to understand what the image is about, which can improve your site’s ranking in image search results.
  • Loading Time: If an image fails to load, the alt text will appear in its place, providing context to the user.

Without proper alt text, you could be missing out on significant SEO benefits and creating a less accessible website.

Common Alt Text Issues in WordPress

Before you can fix alt text issues, it’s important to identify them. Common problems include:

  1. Missing Alt Text: Images uploaded without any alt text.
  2. Duplicate Alt Text: Multiple images with the same alt text, can confuse search engines.
  3. Keyword Stuffing: Overloading alt text with keywords, can lead to penalties from search engines.
  4. Irrelevant Alt Text: Alt text that doesn’t accurately describe the image.

How to Fix Images Alt Text Issue in WordPress

1. Use the Media Library to Add or Edit Alt Text

The simplest way to add or edit alt text is through the WordPress Media Library.

  1. Go to your WordPress dashboard.
  2. Navigate to Media > Library.
  3. To edit a picture, click on it.
  4. In the attachment details window, you’ll see a field labeled “Alt Text.”
  5. Type in an accurate alt-text description of the image that is both detailed and pertinent.
  6. Click Save.

2. Bulk Edit Alt Text Using a Plugin

If you have numerous images without alt text, manually editing each one can be time-consuming. Thankfully, there are plugins available that allow you to bulk edit alt text.

Recommended Plugin: SEO Optimized Images

  1. Install and activate the plugin.
  2. Navigate to the plugin’s settings page.
  3. Choose a template to automatically generate alt text for all your images. You can use variables like {title} or {filename} to customize the alt text.
  4. Click Save Settings to apply the changes.

3. Check for Duplicate Alt Text

Duplicate alt text can dilute the SEO value of your images. To fix this:

  1. Utilize the Yoast SEO Plugin to find pictures that have redundant alt text.
  2. Click on SEO > Then Search Appearance > Then Media.
  3. Check the alt text of images flagged by Yoast and edit them to make each one unique and relevant.

4. Avoid Keyword Stuffing

Although you must put appropriate keywords into your alt text, stay away from keyword stuffing. Here’s how to find the ideal ratio:

  • Keep the alt text short (around 125 characters) and descriptive.
  • Include your keyword naturally without forcing it.
  • Focus on describing what’s in the image rather than stuffing keywords.

5. Optimize Alt Text for Accessibility

To guarantee that every user may visit your website:

  • Use simple language that accurately describes the image.
  • Avoid using phrases like “image of” or “picture of” since screen readers already announce it as an image.
  • Ensure the alt text conveys the function of the image, especially for links or buttons.

Bonus Tip: Use Tools to Audit Alt Text

To regularly check and fix alt text issues, consider using tools like Screaming Frog SEO Spider or Google Search Console. These tools can scan your site for images without alt text or with errors, making it easier to keep your site optimized.

Conclusion

Fixing images’ alt text issues in WordPress is essential for improving your site’s SEO, accessibility, and overall user experience. By following these steps, you can ensure that your images are not only visually appealing but also optimized for search engines and accessible to all users.

Recall that alt text offers you the chance to improve your content and reach a wider audience rather than merely meeting technical requirements. Take the time to review and update your alt text regularly to keep your WordPress site performing at its best.

how to create a blog on wordpress for free 2024

how to create a blog on wordpress for free 2024

Unleash Your Voice: A Complete Guide to how to create a blog on WordPress for free (Even for Novices). The internet is calling, a blank canvas itching to be filled with your voice. A blog may be your platform to connect, educate, and inspire whether you’re an experienced writer with a wealth of experiences to share, a hobbyist expressing your passion, or a business breaking into the digital world.

The positive update, then? It doesn’t have to cost the earth to build one. The most popular content management system (CMS) in the world, WordPress, provides a free way to start a gorgeous and fully functional blog that is ideal for both novice and seasoned bloggers. Also, you can create any kind of WordPress website using this powerful CMS.

Choosing Between Paid and Free WordPress:

Let’s be clear before we get started: WordPress is free and open-source software, but there are two different ways to create a blog, each with pros and downsides of their own:

1. WordPress.com (Free Plan):

  • Ideal for: Absolute beginners, casual bloggers, and those seeking basic functionality.
  • Pros: Free to use, easy setup, automatic updates, no technical maintenance required.
  • Cons: Limited customization options, advertising on your free blog, no custom domain (your URL will have “wordpress.com” in it).

2. Self-Hosted WordPress (Paid Plan):

  • Ideal for: Businesses, serious bloggers, and anybody desiring complete customization and control.
  • Pros: Full control over design, plugins, monetization options, custom domain name, more flexibility and scalability.
  • Cons: Requires purchasing web hosting and domain name (typically starting from $3-5 per month), some technical knowledge needed for setup and maintenance.

For ultimate freedom and professional growth, self-hosted WordPress is ultimately recommended. However, this guide focuses on setting up a free blog on WordPress.com, a perfect springboard for your initial blogging journey.

9 Steps to Your Free WordPress Blog: how to create a blog on WordPress for free

  1. Visit WordPress.com and click “Start Your Website”. Choose the “Free” plan, perfect for our starting point.

  2. Pick a catchy and memorable blog name! This is your brand, so choose something that reflects your content and resonates with your target audience. Remember, with the free plan, your URL will be “[yourblogname]<invalid URL removed>”.

  3. Create your free WordPress.com account with a valid email address and password. Remember, this is your key to accessing and managing your blog.

  4. Embrace your inner designer!  Select a theme that complements the goals and style of your blog. Look through the many free themes and pick one that goes well with your design.

  5. Learn how to use the WordPress dashboard. This is your command center, where you can edit your blog’s settings, make entries, and more. Don’t worry, even for new users, it is simple to use and intuitive.

  6. Craft your first masterpiece! Click “Posts” and then “Add New” to let your imagination run wild. Make use of headers, images, and multimedia components to keep readers interested. Remember, even small steps forward create progress.

  7. Become an SEO whiz (kind of). Search engine optimization (SEO) helps your blog get discovered by the right audience. While the free plan offers basic SEO tools, use relevant keywords naturally throughout your content and titles. Every step counts!

  8. Spread the word! Share your blog on social media, engage with other bloggers, and leave insightful comments on relevant online communities. Concentrating on a particular subject draws a devoted readership and makes you stand out.

  9. Explore monetization options (optional). As your blog grows and thrives, consider premium plans on WordPress.com. These offer features like custom domains and monetization options like displaying ads or selling products. Remember, growth takes time, so enjoy the journey!

Bonus Tips for Beginner Bloggers:

  • Find your niche: What are you passionate about? Focusing on a specific topic attracts a dedicated audience and helps you stand out.
  • Consistency is key: Regularly publish fresh content to keep your readers engaged and coming back for more.
  • Engage with your audience: Respond to comments, answer questions, and build a community around your blog. Keep in mind that you are promoting conversation as well as writing.
  • Learn and grow: There are countless resources available to help you improve your writing, SEO, and design skills.  Don’t be scared to try different things until you find what works best for you.

Self-Hosted WordPress: A Step-by-Step Guide with Trusted Hosting Options

While the free plan on WordPress.com is a fantastic starting point, the allure of self-hosted WordPress beckons for those seeking full control, extensive customization, and monetization potential. This option gives your expanding blog unparalleled flexibility and scalability, but it does need you to get web hosting and a domain name.

 Step-by-step guide for self-hosted WordPress website

1. Selecting a Web Hosting Company:

Several trusted hosting companies cater to WordPress users, each with its strengths and offerings.

Here are a few well-known choices to think about:

  • Hostinger:  Well-known for its one-click WordPress installation, great beginning assistance, and affordable options. Perfect for newbies or those on a limited budget.
  • GoDaddy:  A well-known brand offering easy-to-use tools, copious amounts of storage, and domain registration included in hosting packages. Excellent for new users and those looking for a one-stop shop.
  • SiteGround: Well-known for its security, speed, and WordPress-specific hosting options. Excellent for performance-conscious bloggers and growing websites.
  • Bluehost: WordPress.org officially endorses Bluehost because of its easy-to-use setup, free domain registration, and excellent customer service. a well-liked option for novice and advanced users.

2. Picking Your Domain Name:

Make an informed choice because your domain name serves as your online identity! Choose a distinctive name, that fits the theme of your blog, and is simple to type and spell. Verify the availability of domain names at the hosting company of your choice or specialized registrars such as Namecheap or Google Domains.

3. Purchasing Hosting and Domain:

Head to your chosen hosting provider’s website and browse their WordPress hosting plans. Compare features, storage space, and bandwidth needs to match your anticipated traffic. Most providers offer one-click domain registration during signup, simplifying the process.

4. Installation:

Most hosting providers offer convenient tools for automatic WordPress installation. Usually, they provide a one-click installation option within your control panel. Alternatively, you can download WordPress manually and upload it to your hosting space.

5. Setting Up Your WordPress Site:

Welcome to your control center! This is where you manage settings, publish content, set up plugins, and alter the look and feel of your website. Although WordPress is easy to use, there are a ton of free online tutorials and tools that can help you along the way.

6. Choosing a Theme:

Themes define your blog’s visual identity. Examine the extensive collection of both free and premium themes, keeping in mind things like modification possibilities, responsiveness, and the look you want. Live previews are available for many themes, so you can see your blog before you buy.

7. Installing Essential Plugins:

Plugins add extra functionalities to your WordPress site. While the core platform offers basic features, essential plugins like Yoast SEO for search engine optimization and Akismet for spam protection are highly recommended. Choose plugins relevant to your needs and goals.

8. Creating Compelling Content:

Now comes the fun part! Start crafting your blog posts, pages, and media content. Recall that drawing in and keeping readers depends on providing high-quality material. To gain traction, pay attention to your specialty, interact with your readers, and write frequently.

9. Search engine optimization (SEO):

Your blog’s exposure in search engines like Google is improved by putting fundamental SEO techniques into effect. Make use of Yoast SEO plugins, do keyword research, and improve the titles and structure of your material. Recall that SEO is a long-term endeavor, so exercise patience and constancy.

10. Monetization (Optional):

Examine your choices for making money from your blog once you have a following of readers. Think about selling digital goods, running an affiliate program, selling advertising, or providing premium content subscriptions, depending on your niche and content. Recall that offering your readers value continues to be the cornerstone of effective monetization.

Additional Tips:

  • Learn and Try: Don’t be scared to experiment with different features, plugins, and themes. You may find a plethora of online tutorials and tools to assist you.
  • Interact with the Audience: Engage with your readers through active engagement, participation in online communities, and response to comments. Creating a community encourages growth and loyalty.
  • Analytics and tracking: Track website traffic, identify your target audience and improve your tactics with the help of technologies like Google Analytics.
  • Backup Frequently: Make regular backups of your stuff to safeguard it. Most hosting providers offer automated backup options for peace of mind.

Conclusion:

A successful blog needs commitment, strength, and creativity to build. With its free plan and easy-to-use interface, WordPress provides an ideal starting point for your blogging endeavors. Recall that there is no secret recipe for overnight achievement. Accept the process of learning, enjoy creating your material, and establish a rapport with your audience.

Note that although self-hosted WordPress gives a great deal of freedom and potential, it does involve some initial financial outlay and technical know-how. You can build a successful, personalized blog that resonates with your target audience and represents your distinct voice with commitment, education, and the appropriate resources. You’ll be well on your way to creating a profitable blog that you can really call your own by selecting a reliable hosting company, adhering to these instructions, and making use of the resources at your disposal.

(FAQs):

1. Purchasing a plan and then upgrading later?

Yes, absolutely! WordPress.com offers various paid plans that unlock additional features like custom domains, increased storage, plugin access, and monetization options. Anytime your blog grows and needs more features, you can easily upgrade.

2. Does the free plan have a limit on the number of posts I can publish?

No, the amount of posts you may publish with the free plan is unlimited. However, depending on how you use it, storage space may be limited. If additional storage is required, upgrading to a premium plan can offer it.

3. Can you make money with a free WordPress blog?

Write for a month or longer at the beginning. Compose posts on WordPress with consistency. Create fantastic content and optimize your WordPress articles for search engines. Make your website look responsive after performing SEO. Then just submit a Google AdSense application. If your material is good, then traffic will come in! Thus, you can start earning a lot with this strategy and do it in just two or three months.

4. What about copyright and ownership of my content?

Regardless of the WordPress plan you select, you maintain complete ownership and copyright to any material you produce and post on your blog.

5. Can I install plugins on WordPress blog using a free plan?

No, custom code and plugin installations are restricted on the free plan. However, WordPress.com offers a limited selection of free plugins within the platform that you can utilize. You are not permitted to install plugins on WordPress.com if you are referring to the free plan. However, you must get the Business Plan if installing a plugin is something you’re truly interested in doing.

6. Can I move my WordPress blog to self-hosted WordPress later on?

WordPress.com provides services and tools to export your material and import it onto a self-hosted WordPress site if you subsequently desire to upgrade, even though it is not a straight transfer.

7. Where can I locate further resources and assistance for WordPress.com users?

WordPress.com offers extensive help files, guides, and a support forum to assist you in utilizing the platform and resolving any problems you may run across. Furthermore, WordPress-focused forums and online communities are great places to learn from other users and share knowledge.

Recall that this is only the beginning. You’ll find that you have access to even more options and resources as you continue on your blogging adventure. So enjoy the journey, speak up, and have fun with your blogging!

How to Make an Ecommerce Website with WordPress

How to Make an Ecommerce Website with WordPress in 7 steps

How to make an ecommerce website with WordPress To sell your products, you’ll need to purchase a domain, sign up for hosting, and install WordPress – this article will walk you through every step of the process and more!

Using WordPress to build an eCommerce website offers online entrepreneurs a world of possibilities. In this extensive guide, we’ll walk you through each stage, ensuring you build a working internet business and optimize it for success.

As WordPress is such a popular, sophisticated, and scalable platform, it’s no wonder that you want to create an ecommerce website with it. However, solid site hosting and dependable plugins are also required to develop a successful online business on WordPress.

Building an online store using Hostinger and WooCommerce is a terrific alternative if you’re connecting it with a WordPress site.

In this step-by-step guide, you will also learn how to create ecommerce website in WordPress free

How to Make an Ecommerce Website with WordPress follow the easy 7 steps

Follow the steps below to launch your ecommerce website.

Step 1: Choose the Perfect Domain Name

An important initial step is to choose the name of the domain. Your domain name is essentially the unique address for your website. It’s more than simply a street address; it’s your brand. Choose a memorable name, that represents your company, and is simple to spell. Avoid complicated names that may result in misspellings.

“Several well-known hosting providers offer a complimentary domain when you purchase a hosting plan. Begin by searching for your domain to take advantage of this free offer.”

Domain names can be purchased from websites such as NameCheap. If you’re lucky, the one you desire will be free or selling at the typical cheap rate ($10 – $20/year).

buy doamin namecheap


If you’re unlucky, your dream domain name may be unavailable or offered for resale at a considerably higher price – sometimes hundreds or even thousands of dollars. This is only for the first year; after that, even the most expensive domain names will renew at the usual fee ($10 – $20/year).

It’s worth noting that.com is the’strongest’ and most popular domain extension (ending). It’s a wise choice for online retailers because it allows you to sell globally. If you use a country-specific extension (such as.us), you risk limiting your future growth potential.

Step 2: Sign Up to a Hostinger Hosting Provider

There are many hosting providers some popular companies are Bluehost, GoDaddy, and SiteGround Choosing the correct hosting company is vital for the functioning of your website but our recommendation is to go with Hostinger provides a variety of hosting services, such as Shared Hosting, Virtual Private Servers (VPS), Managed Dedicated Servers, and Managed WordPress Hosting.

sign up

Step 3: One Click or install WordPress Manually

Installing WordPress is simplified with Hostinger’s ‘One-click’ installation. Alternatively, you can opt for a manual installation.

  • WordPress can be installed in two ways:
  1. Install with a single click from your hosting dashboard.
  2. Manually downloading and uploading WordPress to your hosting account

1. One-click installation

As you might think, the first choice is the simplest and the one we recommend. When selecting a hosting service, search for those that have the benefit of ‘one-click’ installs.

Once you’ve joined up with a hosting provider that offers this type of installation, all you have to do is go into your hosting dashboard and click the ‘Install WordPress’ option.

2. Manual WordPress installation

how create an ecommerce website using wordpress

If your hosting company does not provide one-click WordPress installation, you must download WordPress to your computer and then upload it to your hosting dashboard. It’s not as simple as it appears.

Step 4: Install and Configure WooCommerce

install and activate woocommerce plugin

Install WooCommerce

  1. Log in to your WordPress Dashboard.
  2. Go to ‘Plugins.’
  3. Click ‘Add New.’
  4. Search for “WooCommerce.”
  5. Click ‘Install Now’ next to WooCommerce.
  6. Activate the plugin.
  7. Follow the WooCommerce Setup Wizard.

After successfully installing WordPress, login to your WordPress dashboard and click on the plugins then add a new plugin search woocommerce in

The most popular WordPress plugin for adding ecommerce capabilities to your site is WooCommerce. It has over 4 million active installations and a 4.6/5 rating from over 3,000 users. It’s safe to say it’s rather popular, and it’s easy to understand why.

For starters, it’s completely free. WooCommerce, like WordPress, is an open-source platform created by a community. While some ‘extensions’ (such as the option for clients to book appointments) may need payment, you can convert your website into an online store without spending a dime. This includes the following:

4.1 Install and Activate WooCommerce plugin

WooCommerce is the most popular WordPress eCommerce plugin. It may be installed and activated from the WordPress dashboard.

Adding Products with WooCommerce

Effortlessly add your products or services to your online store with WooCommerce’s intuitive interface.

4.3 Add Business Details

Personalize your store by adding crucial business details, fostering a sense of trust with potential customers.

4.4 Select Payment Options

Choose the payment gateways that align with your business model. WooCommerce supports various options for seamless transactions.

WooCommerce supports a variety of payment gateways to facilitate transactions on your online store. Here are some popular payment gateways commonly used with WooCommerce:

  1. Stripe:
    • A popular payment gateway that lets you accept credit card payments straight on your website.
  2. PayPal:
    • Customers can use their PayPal account or credit/debit cards to make payments without revealing sensitive information.
  3. Square:
    • Integrates with WooCommerce easily, giving an all-in-one solution for in-person and online payments.
  4. Authorize.Net:
    • Offers secure payment processing services, supporting credit cards and eChecks.
  5. 2Checkout:
    • Customers can pay with a variety of options, including credit cards and PayPal.
  6. Braintree:
    • Braintree, which is owned by PayPal, is well-known for its ease of integration and support for a variety of payment methods.
  7. Amazon Pay:
    • Enables customers to use the payment information stored in their Amazon accounts to make purchases on your site.
  8. WooCommerce Payments:
    • Developed by WooCommerce, this payment gateway provides a straightforward solution for credit and debit card payments.
  9. Klarna:
    • Offers buy now, pay later options, providing flexibility for customers.
  10. Skrill:
    • Supports various payment methods and currencies, allowing for international transactions.
  11. Apple Pay:
    • Enables customers to make payments using Apple devices with a secure and convenient checkout process.
  12. Google Pay:
    • Google Pay, like Apple Pay, enables rapid and secure payments on mobile devices.

Consider transaction costs, supported currencies, and the preferences of your target audience before selecting a payment gateway. Additionally, ensure that the payment gateway complies with security standards to protect sensitive customer information.

4.5 Confirm Shipping Options

Define your shipping methods and costs. Provide clarity on delivery times and expectations.

4.6 Sales Tax Module

Navigate WooCommerce’s Sales Tax Module to ensure compliance with tax regulations specific to your location.

4.7 Choose a Payment Method

Offer diverse payment methods to cater to a broader audience. Secure transactions are key to customer trust.

Step 5: Choose a WooCommerce Theme

Your website’s “theme” is the foundational design for all your web content. WordPress offers the advantage of complete customization, allowing you to modify or add to the HTML code and transform your site into something distinct from its original design.

However, unless you possess coding expertise and enjoy the prospect of full customization, it’s prudent to select a theme that closely aligns with your envisioned final product. In essence, opt for a theme that suits your preferences and functions well for your ecommerce site, even if it entails investing in a premium template from a third-party site. This decision will save you significant hassle in the long term.

Prominent third-party sites for theme purchases include ThemeForest, which offers an extensive selection, and Elegant Themes, which provides a more curated collection. Nevertheless, numerous excellent sites are available. Once you have a substantial number of products prepared, it’s time to delve into the enjoyable aspect of the process – selecting a theme!

how to install and activate wordpress theme

Free WordPress themes are accessible in the theme directory, accessible through your dashboard:

  1. Login to your WordPress dashboard.
  2. Hover over ‘Appearance’, then select ‘Themes’ to access the theme dashboard.
  3. Click the ‘Add New’ button above the themes and explore options under ‘Featured’, ‘Popular’, etc., or use the search bar for specific industries.
  4. Test a few themes to discover your preferred one, then click ‘Install’ under the chosen theme for download.
  5. After a few minutes, a button labeled ‘Activate’ will appear under the theme. Click it, and the theme is now yours!

To install a premium theme on your site:

  1. Download the .zip file for your new theme.
  2. Login to your WordPress Dashboard.
  3. Hover over ‘Appearance’, then select ‘Themes’ to access the theme dashboard.
  4. Click ‘Add New’ to enter the WordPress theme dashboard.
  5. Click the blue ‘Upload Theme’ button at the top.
  6. You’ll be prompted to select a .zip file from your computer – choose your new theme file.
  7. A success message will appear, providing a link to activate your theme. That’s it – you’re ready to go!

Step 6:Install more plugins

1. UpdraftPlus:

  1. Login to your WordPress Dashboard.
  2. Navigate to ‘Plugins’ in the left-hand menu.
  3. Click ‘Add New.’
  4. Search for “UpdraftPlus.”
  5. Click ‘Install Now’ next to UpdraftPlus.
  6. Activate the plugin.
  7. Configure UpdraftPlus settings for automated backups and enhanced data security.

how to install and actiavte wordpress plugin

2. Rank Math:

  1. Login to your WordPress Dashboard.
  2. Navigate to ‘Plugins’ in the left-hand menu.
  3. Click ‘Add New.’
  4. Search for “Rank Math.”
  5. Click ‘Install Now’ next to Rank Math.
  6. Activate the plugin.
  7. Follow the setup wizard to configure Rank Math for optimal SEO.

3. Wordfence Security:

  1. Login to your WordPress Dashboard.
  2. Navigate to ‘Plugins’ in the left-hand menu.
  3. Click ‘Add New.’
  4. Search for “Wordfence Security.”
  5. Click ‘Install Now’ next to Wordfence Security.
  6. Activate the plugin.
  7. Configure Wordfence Security settings for enhanced website protection.

4. WP-Optimize:

  1. Login to your WordPress Dashboard.
  2. Navigate to ‘Plugins’ in the left-hand menu.
  3. Click ‘Add New.’
  4. Search for “WP-Optimize.”
  5. Click ‘Install Now’ next to WP-Optimize.
  6. Activate the plugin.
  7. Configure WP-Optimize settings to optimize and clean up your website’s database for better performance.

Congratulations! You’ve successfully installed and configured UpdraftPlus, Rank Math, Wordfence Security, and WP-Optimize to enhance your online store’s performance, SEO, security, and backups. Regularly update these plugins to ensure you have the latest features and security patches.

Step 7:Add Some Required pages


1. Privacy Policy:

  • The Privacy Policy outlines how you collect, use, and protect customer information. It includes details about data collection, cookies, and how personal information is handled.

2. Refund Policy:

  • This page explains your policy regarding product returns and refunds. Specify the conditions under which refunds are issued, the process customers need to follow, and any time constraints on returns.

3. Contact Us:

  • Customers can contact your company using the Contact Us page. Include a contact form, email address, and any other contact details. This helps build trust and provides a channel for customer inquiries.

4. Terms and Conditions:

  • The Terms and Conditions page lays out the ground rules for using your eCommerce website.. It covers aspects such as user responsibilities, intellectual property rights, disclaimers, and any legal obligations.

How to Create These Pages:

how to create pages in wordpress

  1. Login to your WordPress Dashboard.
  2. Navigate to ‘Pages’ and click on ‘Add New.’
  3. Privacy Policy:
    • Use a Privacy Policy generator or customize a template to suit your business. Many online tools provide free templates that you can adapt.
    • Title the page “Privacy Policy” and paste your content.
    • Publish the page.
  4. Refund Policy:
    • Similar to the Privacy Policy, you can use a generator or customize a template.
    • Title the page “Refund Policy” and paste your content.
    • Publish the page.
  5. Contact Us:
    • Title the page “Contact Us.”
    • Include a contact form using a plugin like Contact Form 7 or WPForms.
    • Add your business contact details.
    • Publish the page.
  6. Terms and Conditions:
    • Generate or customize a Terms and Conditions template.
    • Title the page “Terms and Conditions” and paste your content.
    • Publish the page.

Once these pages are published, link them in your website’s footer or menu for easy access. Regularly review and update them to ensure they remain accurate and compliant with any changes in your business or relevant laws.

Conclusion

In conclusion, how build an ecommerce website from scratch using WordPress offers a powerful and versatile platform for online entrepreneurs. This comprehensive guide has taken you through each crucial stage, ensuring that you not only establish a functioning internet business but also optimize it for success.

The selection of a perfect domain name is a fundamental step, in representing your brand and ensuring memorability. Utilizing hosting services from providers like Hostinger, coupled with the installation of WordPress through a one-click or manual process, sets the foundation for your eCommerce venture.

The integration of WooCommerce, a popular and free WordPress plugin, provides essential eCommerce capabilities. This includes adding and configuring products, choosing payment gateways, defining shipping methods, and addressing tax considerations. The guide emphasizes the importance of selecting a suitable WooCommerce theme, offering customization options to align with your brand and enhance the user experience.

Furthermore, the inclusion of additional plugins like UpdraftPlus, Rank Math, Wordfence Security, and WP-Optimize enhances your online store’s performance, SEO, and security. Regular updates are recommended to ensure the latest features and security patches.

Addressing legal and trust-building aspects, the guide emphasizes the creation of essential pages such as Privacy Policy, Refund Policy, Contact Us, and Terms and Conditions. These sites not only meet legal obligations but also foster client trust.

In summary, you have completed the process of how to make an eCommerce website with WordPress by following the steps indicated. Your platform now has the tools and configurations needed to not only sell products but also to deliver a secure and seamless shopping experience for your clients. To ensure continuing success, keep up to date with the latest trends, technologies, and security procedures as your online business advances.

Q1: Why should I choose WordPress for building my eCommerce website?

A1: WordPress is a well-known, powerful, and scalable platform that provides a plethora of opportunities for online companies. Its versatility, substantial community support, and vast plugin library make it an excellent choice for designing and managing eCommerce websites.

Q2: How do I pick the best domain name for my eCommerce site?

A2: Choose a memorable name for your brand that is easy to spell and avoids difficult or misspelled words.. Use reputable domain registrars like NameCheap and aim for a .com extension for global reach.

Q3: Why is Hostinger recommended for hosting services?

A3: Hostinger offers Shared Hosting, Virtual Private Servers (VPS), Managed Dedicated Servers, and Managed WordPress Hosting. It is well-known for its dependability, simple interface, and one-click WordPress installation.

Q4: Can I manually install WordPress if my hosting provider does not provide a one-click installation?

A4: If your hosting provider does not provide one-click installation, you can manually download and upload WordPress to your hosting account. However, it entails more stages and may be more difficult.

Q5: Why is WooCommerce recommended for adding eCommerce capabilities to my site?

A5: WooCommerce is a popular WordPress plugin with over 4 million active installations and an excellent rating. It’s open-source and free, with a simple interface for adding products, configuring payment gateways, and managing online transactions.

Q6: How do I choose a suitable WooCommerce theme for my eCommerce website?

A6: You can choose a theme that aligns with your preferences and eCommerce needs from the WordPress theme directory. Additionally, premium themes from third-party sites like ThemeForest and Elegant Themes offer more customization options.

Q7: Are there any recommended plugins for enhancing my online store’s performance, SEO, and security?

A7: Yes, recommended plugins include UpdraftPlus for backups, Rank Math for SEO, Wordfence Security for website protection, and WP-Optimize for optimizing your website’s database.

Q8: Why are essential pages like Privacy Policy, Refund Policy, Contact Us, and Terms and Conditions important for my eCommerce website?

A8: These pages are crucial for legal compliance and building trust with customers. The Privacy Policy outlines data handling practices, the Refund Policy explains return procedures, Contact Us provides a way for customers to reach you, and the Terms and Conditions establish rules for website usage.

Q9: Can I use free WordPress themes for my eCommerce website?

A9: Yes, free WordPress themes are available in the theme directory and can be easily installed through your WordPress dashboard. However, premium themes offer more features and customization options.

Q10: How often should I update the plugins installed on my eCommerce website?

A10: It’s recommended to regularly update plugins to ensure you have the latest features and security patches. This helps maintain the performance, security, and functionality of your online store.

How to Make Your WordPress Website Mobile Friendly

How to Make Your WordPress Website Mobile Friendly

Introduction

In modern day digital age, having a cellular-friendly internet site is vital for the success of your commercial enterprise. With the increasing number of users accessing the internet on their mobile devices, it is important to ensure that your WordPress website is optimized for mobile viewing.

Why is Mobile Friendliness Important?

1. Improved User Experience: A mobile-friendly website provides a seamless browsing experience for your visitors, regardless of the device they are using. This leads to higher engagement and increased chances of conversions.

2. Higher Search Engine Rankings: Google considers cellular-friendliness as a rating element. If your website is not mobile-friendly, it may be penalized in search engine results, resulting in lower visibility and organic traffic.

How to Make Your WordPress Website Mobile Friendly

1. Choose a Responsive Theme: Start by selecting a responsive WordPress theme that automatically adjusts its layout and design based on the screen size of the device. This ensures that your website looks great on all devices, from smartphones to tablets.

2. Optimize Images: Large images can slow down your website’s loading speed, especially on mobile devices with slower internet connections. Use image optimization plugins or tools to compress and resize your images without compromising on quality.

3. Use a Mobile-Friendly Plugin: There are several WordPress plugins available that can make your website mobile-friendly. These plugins optimize your website’s design, layout, and functionality for mobile devices.

4. Test Your Website: After making the necessary changes, it is important to test your website on various mobile devices and screen sizes. This will help you pick out any issues and make further improvements

Understanding Mobile Optimization

Importance of Mobile-Friendly Websites

Mobile gadgets account for a good portion of internet traffic. A mobile-friendly website enhances user experience, boosts SEO rankings, and increases visitor retention.

Google’s Mobile-First Indexing

Google prioritizes mobile-friendly websites in its search results. Optimizing for mobile can significantly impact your website’s visibility and reach.

Evaluating Your Current Website

Mobile Compatibility Check

Use Google’s Mobile-Friendly Test to assess your internet site’s cell compatibility Identify issues hindering mobile optimization.

Page Loading Speed

Mobile users expect swift loading times. Analyze your website’s speed using tools like Google PageSpeed Insights and optimize accordingly.

Choosing a Mobile-Friendly WordPress Theme

Responsive Design

Select a WordPress theme with a responsive design that adapts seamlessly to various screen sizes, ensuring a consistent user experience.

Lightweight Themes

Opt for lightweight themes that prioritize functionality over excessive design elements, ensuring faster loading times on mobile devices.

Optimizing Images and Media

Image Compression

Compress images without compromising quality. Use plugins like Smush to reduce file sizes, enhancing mobile loading speeds.

Video Embedding

Utilize responsive video embedding techniques to ensure videos adjust proportionally to different screen sizes, maintaining clarity and engagement.

Streamlining Navigation and Content

Clear Menu Structure

Simplify your menu structure for effortless navigation on smaller screens. Prioritize essential pages and content for mobile users.

Readable Typography

Choose legible fonts and maintain optimal font sizes for mobile devices. Ensure content is easily readable without the need for zooming.

Implementing Mobile Plugins

Mobile Optimization Plugins

Explore WordPress plugins like WPtouch that specialize in mobile optimization. These plugins offer consumer-friendly interfaces and customization alternatives.

AMP Integration

Implement Google’s Accelerated Mobile Pages (AMP) to create lightning-fast, stripped-down versions of your website for mobile users.

User Testing and Feedback

Conducting Mobile Testing

Test your mobile-friendly website across various devices and browsers. Address any inconsistencies in layout or functionality.

Gathering User Feedback

Encourage user feedback to identify areas of improvement. User insights can reveal valuable perspectives on mobile usability.

Additional Tips for Mobile Optimization

– Keep your content concise and clean to examine on smaller monitors. – Use a legible font length and clean typography

– Ensure that your website’s buttons and navigation menus are easily clickable on touchscreens. – Minimize the use of pop-ups and interstitials that can obstruct the user’s browsing experience.

– Optimize your internet site’s loading speed by using minimizing using massive files and scripts

Conclusion: Embracing Mobile-Friendly Design

In today’s digital age, a mobile-friendly WordPress website is not just an advantage – it’s a requirement. By prioritizing mobile optimization, you enhance user experience, improve search engine visibility, and ultimately drive your online success. Making your WordPress website mobile-friendly is essential for providing a positive user experience and improving your search engine rankings.

By following the tips mentioned in this article, you can ensure that your website looks great and functions well on all devices. Take the necessary steps today to make your website mobile-friendly and stay ahead of the competition.

FAQs

Q1: Why is mobile optimization crucial for my WordPress website?

Mobile optimization ensures your website is accessible and user-friendly across diverse devices, enhancing user experience and search engine rankings.

Q2: Can I optimize my existing WordPress website for mobile devices?

Yes, you can optimize your current website by choosing a responsive theme, compressing images, streamlining content, and using mobile optimization plugins.

Q3: What is Google’s Mobile-First Indexing, and how does it impact my website?

Google’s Mobile-First Indexing means Google primarily uses the mobile version of a site for ranking and indexing. Having a mobile-friendly website is essential for SEO and visibility.

Q4: Are there any free tools to check my website’s mobile compatibility?

Yes, Google provides a Mobile-Friendly Test tool that allows you to assess your website’s mobile compatibility and suggests improvements.

Q5: How can I gather user feedback on my mobile-friendly website?

You can incorporate feedback forms, surveys, or user testing sessions to collect valuable insights from your website visitors regarding their mobile experience.